Emergency roof tarping is a critical step to protect your home from further damage after a storm or other unexpected events. Properly and efficiently securing a tarp can save you time, money, and potential stress.
In this article, we will dive deep into the subject, offering various insights and best practices that will help you effectively protect your home with roof tarping.
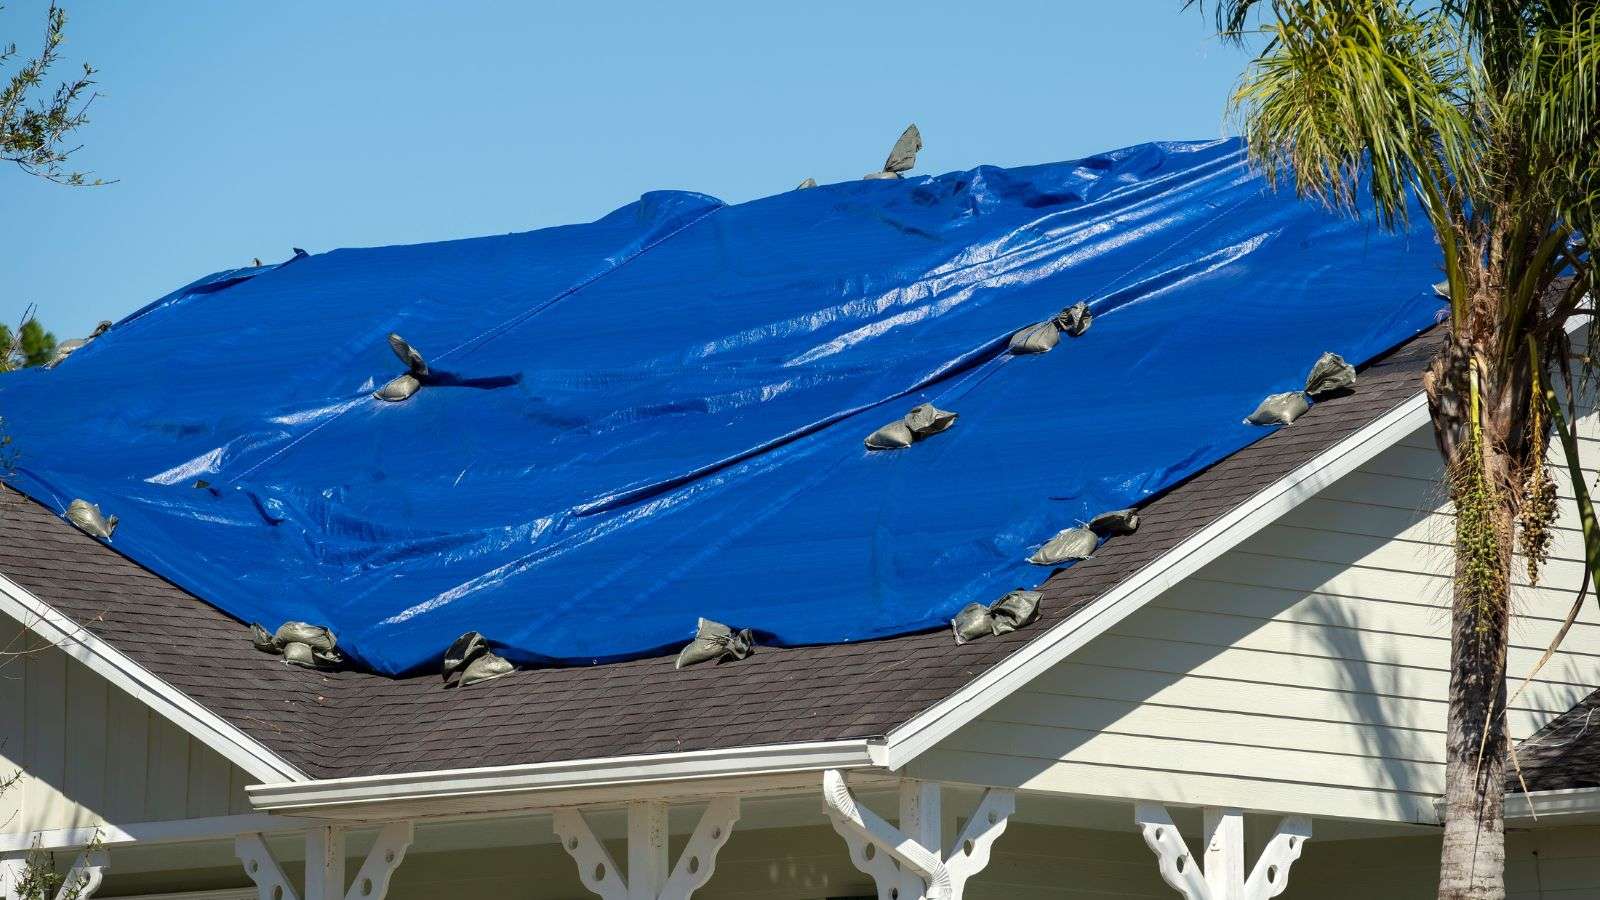
The Importance of Emergency Roof Tarping
Emergency roof tarping is a major step in mitigating further damage to a property after a roof has been compromised. When a roof is damaged due to severe weather, falling trees, or other unforeseen events, it exposes the interior of the building to the elements. This can lead to water intrusion, which can cause extensive structural damage, mold growth, and other costly repairs. By immediately tarping the damaged area, property owners can create a temporary barrier that prevents water from entering the building and causing additional harm.
The primary importance of emergency roof tarping lies in its ability to protect the property and its occupants from further harm. Tarping aids in structural preservation by reducing water infiltration, which in turn prevents collapse or additional damage to the interior. Moreover, it helps safeguard valuable belongings, furniture, and equipment from being ruined by water exposure.
Tarping also provides a short-term solution while property owners arrange for permanent repairs or replacement of the damaged roof. It buys time for insurance claims to be processed and for contractors to be scheduled, ensuring that the necessary repairs can be completed efficiently and effectively.
Furthermore, emergency roof tarping can help prevent secondary issues such as mold growth. Moisture from water intrusion can create an ideal environment for mold spores to thrive. By promptly tarping the damaged area and preventing water from entering, the risk of mold growth is significantly reduced.
To illustrate the importance of emergency roof tarping, consider the following example: During a severe storm, a large tree limb crashes onto a residential roof, causing substantial damage. Without immediate tarping, rainwater would seep into the attic, saturating insulation, damaging ceilings, and potentially leading to electrical hazards. However, by promptly applying a tarp over the damaged section, homeowners can protect their property from further water damage until repairs can be carried out.
5 Must-Know Tips for Effective Emergency Roof Tarping
1. Prepare the area and gather the necessary tools.
Before starting emergency roof tarping, it is essential to check the safety of yourself and others. Clear any debris or obstructions around the damaged area to provide a safe working environment. Gather the necessary tools and materials, such as a tarp, nails or screws, a hammer or drill, and a ladder if needed. Having everything ready beforehand will help streamline the tarping process and minimize delays.
2. Secure the Tarp Properly
If you want the tarp to keep water out, you have to tie it down correctly. Start by positioning the tarp over the damaged area, making sure it extends beyond the damaged section to provide adequate coverage. Use nails or screws to secure the tarp to the roof, placing them at regular intervals along the edges and seams for a secure attachment. Take care not to puncture the tarp unnecessarily, as this can compromise its waterproofing capabilities.
3. Create a Slope for Water Drainage
To prevent water from pooling on the tarp and potentially causing additional damage, you need to create a slope for water drainage. You can accomplish this by gently sloping the tarp towards the edge of the roof or by using additional supports. Water can be prevented from seeping underneath a tarp and creating additional problems if it is given enough time to drain off of it.
4. Reinforce Weak Areas
If the damaged section of the roof has weakened or compromised areas, it’s recommended to reinforce those areas before applying the tarp. This can be done by using additional layers of tarp or by reinforcing the tarp with boards or plywood beneath it. Reinforcing weak areas helps provide extra protection and stability, reducing the chances of further damage during inclement weather.
5. Monitor and Regularly Inspect
Once the emergency roof tarping is in place, it’s necessary to monitor and regularly inspect the tarped area. Check for any signs of water leakage, shifting tarps, or any other issues that may require immediate attention. Regular inspections allow for early detection of potential problems, enabling timely repairs or adjustments to be made before further damage occurs.
Remember, emergency roof tarping is a temporary solution, and the key is to arrange for permanent repairs as soon as possible. Contacting a professional roofing contractor is suggested to assess the extent of the damage and provide expert guidance on the necessary repairs or roof replacement.
Assessing the Damage and Planning
Before taking any action, the first step is to thoroughly evaluate the extent of the damage and identify any potential hazards. This assessment can help determine the appropriate course of action and maintain the safety of those involved.
Planning involves considering factors such as the availability of resources, weather conditions, and scheduling repairs or replacements. Property owners can make educated decisions and take the required actions to handle the emergency roof situation effectively by thoroughly evaluating the damage and strategically planning what to do next. For example, if a severe storm has caused significant damage to a commercial building’s roof, assessing the damage may involve inspecting the interior for signs of water intrusion and examining the exterior for visible structural issues.
The planning phase may then include prioritizing immediate tarping to prevent further damage and coordinating with contractors to schedule repairs promptly.
Materials and Tools for Emergency Roof Tarping
- Tarp: A high-quality tarp is essential for emergency roof tarping. Look for a heavy-duty tarp made of a waterproof and durable material such as polyethylene or canvas. The size of the tarp should be sufficient to cover the damaged area and provide ample overlap for secure attachment.
- Nails or screws: Nails or screws are used to secure the tarp to the roof. Choose corrosion-resistant options like galvanized nails or stainless steel screws to guarantee durability. Use nails or screws with large heads to provide better grip and minimize the risk of tearing the tarp.
- Hammer or Drill: A hammer or drill is necessary for driving nails or screws into the roof to secure the tarp. A claw hammer is commonly used for driving nails, while a power drill with appropriate bits is preferred for securing screws.
- Ladder: Depending on the height of the roof, a ladder may be required to access the damaged area safely. Make sure the ladder is sturdy and properly positioned to prevent accidents. Follow proper ladder safety guidelines when working at heights.
- Protective Gear: It is essential to wear appropriate protective gear during emergency roof tarping. This may include gloves, safety goggles, and non-slip footwear. Protective gear helps safeguard against injuries and makes for a safer working environment.
- Additional Tools: Depending on the specific situation, additional tools may be needed. This can include a utility knife for cutting the tarp to size, a measuring tape for accurate measurements, and a pry bar or crowbar for removing any debris or obstructions from the damaged area.
Roof Tarping Installation Techniques
- Positioning the Tarp: Start by positioning the tarp over the damaged area, ensuring that it extends beyond the damaged section to provide adequate coverage. The tarp should be centered and evenly distributed to create a uniform barrier against water intrusion.
- Securing the Tarp: Use nails or screws to secure the tarp to the roof. Place them at regular intervals along the edges and seams of the tarp, ensuring a secure attachment. Avoid unnecessary punctures in the tarp, as they can compromise its waterproofing capabilities.
- Creating Overlaps: To enhance the effectiveness of the tarp, create overlapping sections. Overlaps help prevent water from seeping through gaps and provide additional protection against wind-driven rain. Verify that each overlap is properly secured to maintain a watertight seal.
- Slope for Water Drainage: To prevent water from pooling on the tarp, create a slope for water drainage. You can accomplish this by angling the tarp slightly in the direction of the roof’s edge or by using additional supports to make a gentle slope. Proper water drainage minimizes the risk of water seeping underneath the tarp and causing further damage.
- Reinforcing Weak Areas: If there are weakened or compromised areas on the damaged roof, reinforce those sections before applying the tarp. Additional layers of tarp or reinforcing with boards or plywood can provide extra protection and stability, reducing the chances of further damage during inclement weather.
- Regular Inspections: Once the tarp is installed, regularly inspect the tarped area for any signs of shifting, tears, or water leakage. Regular inspections allow for early detection of potential issues and enable timely repairs or adjustments to be made. Monitoring the tarped area helps verify its effectiveness in protecting against water intrusion.
Safety Precautions During Roof Tarping
- Personal Protective Equipment (PPE): Wear appropriate personal protective equipment, including gloves, safety goggles, and non-slip footwear, to protect yourself from potential hazards. PPE safeguards against injuries from sharp objects, falls, or debris during the tarping process.
- Secure Ladder Usage: If a ladder is required to access the damaged area, guarantee it is placed on stable ground and properly secured. Use ladder stabilizers or have someone hold the ladder for added stability. Always maintain three points of contact while climbing up or down the ladder.
- Weather Awareness: Be aware of weather conditions before and during tarping. Avoid working on the roof during severe weather, high winds, or when lightning is present. Slippery surfaces increase the risk of falls, and adverse weather can make tarp installation more challenging or dangerous.
- Proper Footing and Balance: Maintain secure footing and balance when working on the roof. Watch out for slippery surfaces and debris that may cause you to lose balance. Take slow and deliberate steps to ensure stability, especially when carrying tools or materials.
- Tool Handling: Handle tools with care and check that they are in good working condition. Inspect tools for any damage or defects before use. Use them according to their intended purpose and follow proper safety guidelines to minimize the risk of accidents or injuries.
- Working with a Partner: Whenever possible, have a partner assist you during roof tarping. They can provide support, help with securing the tarp, and be available in case of an emergency. Working as a team increases safety and efficiency.
- Avoid Power Lines: Be cautious of nearby power lines when working on the roof. Keep a safe distance from electrical wires to prevent electrocution hazards. If the damaged area is close to power lines, consult professionals such as electricians or utility companies for guidance.
When to Seek Professional Help for Roof Tarping
Roof tarping is an area where it is best to call in the pros in some cases. If you are unsure of your ability to safely and effectively install a tarp on your roof, it is best to consult with a professional roofing contractor. They have the expertise, experience, and proper equipment to handle emergency roof tarping efficiently.
Professional roofers can conduct a thorough assessment of the damage, provide an accurate evaluation of the required repairs, and offer guidance on the best course of action. Seeking professional help is particularly needed in cases of extensive damage, complex roof structures, or when dealing with commercial properties.
By engaging professionals, such as those listed on our website directory, Big Home Projects, you can make sure the emergency roof tarping is done correctly and that your property is protected until permanent repairs or replacements can be made.
The Next Steps: Repair and Maintenance After Tarping
- Schedule a Professional Roof Inspection: After emergency roof tarping, it is necessary to schedule a professional roof inspection. A qualified roofing contractor can assess the extent of the damage and provide recommendations for repairs or replacement. The inspection will help identify any underlying issues that may have caused the damage and make sure all necessary repairs are addressed.
- Arrange for Permanent Repairs: Based on the findings of the roof inspection, arrange for permanent repairs as soon as possible. Work with a reputable roofing contractor to carry out the necessary repairs or replacements to restore the roof’s integrity. Prompt action will help prevent further damage and potential issues in the future.
- Address Water Damage and Mold: If water has already entered the property before tarping, it is essential to address any water damage promptly. Dry out affected areas and consider hiring professionals to mitigate water damage and prevent mold growth. Mold can pose health risks and further compromise the structural integrity of the property if left untreated.
- Regular Roof Maintenance: Once the roof is repaired, establish a regular roof maintenance schedule to prevent future issues. This includes inspecting the roof periodically, clearing debris, checking for signs of damage or wear, and addressing any minor issues before they escalate. Regular maintenance can prolong the lifespan of the roof and help avoid emergency situations in the future.
- Review Insurance Coverage: If the roof damage was due to an insurable event, review your insurance policy coverage. Contact your insurance provider to initiate a claim and confirm that you have all the necessary documentation for a smooth claim process. Understanding your coverage will help you navigate the financial aspect of the repairs or replacement.