Truss uplift is a common structural issue in buildings that can lead to aesthetic and structural problems if not addressed properly. Understanding it and knowing how to prevent it is key to maintaining the aesthetic appeal and structural integrity of a building.
In this article, we will guide you through the essentials of preventing truss uplift, ensuring you are empowered to preserve the structural stability of your building.
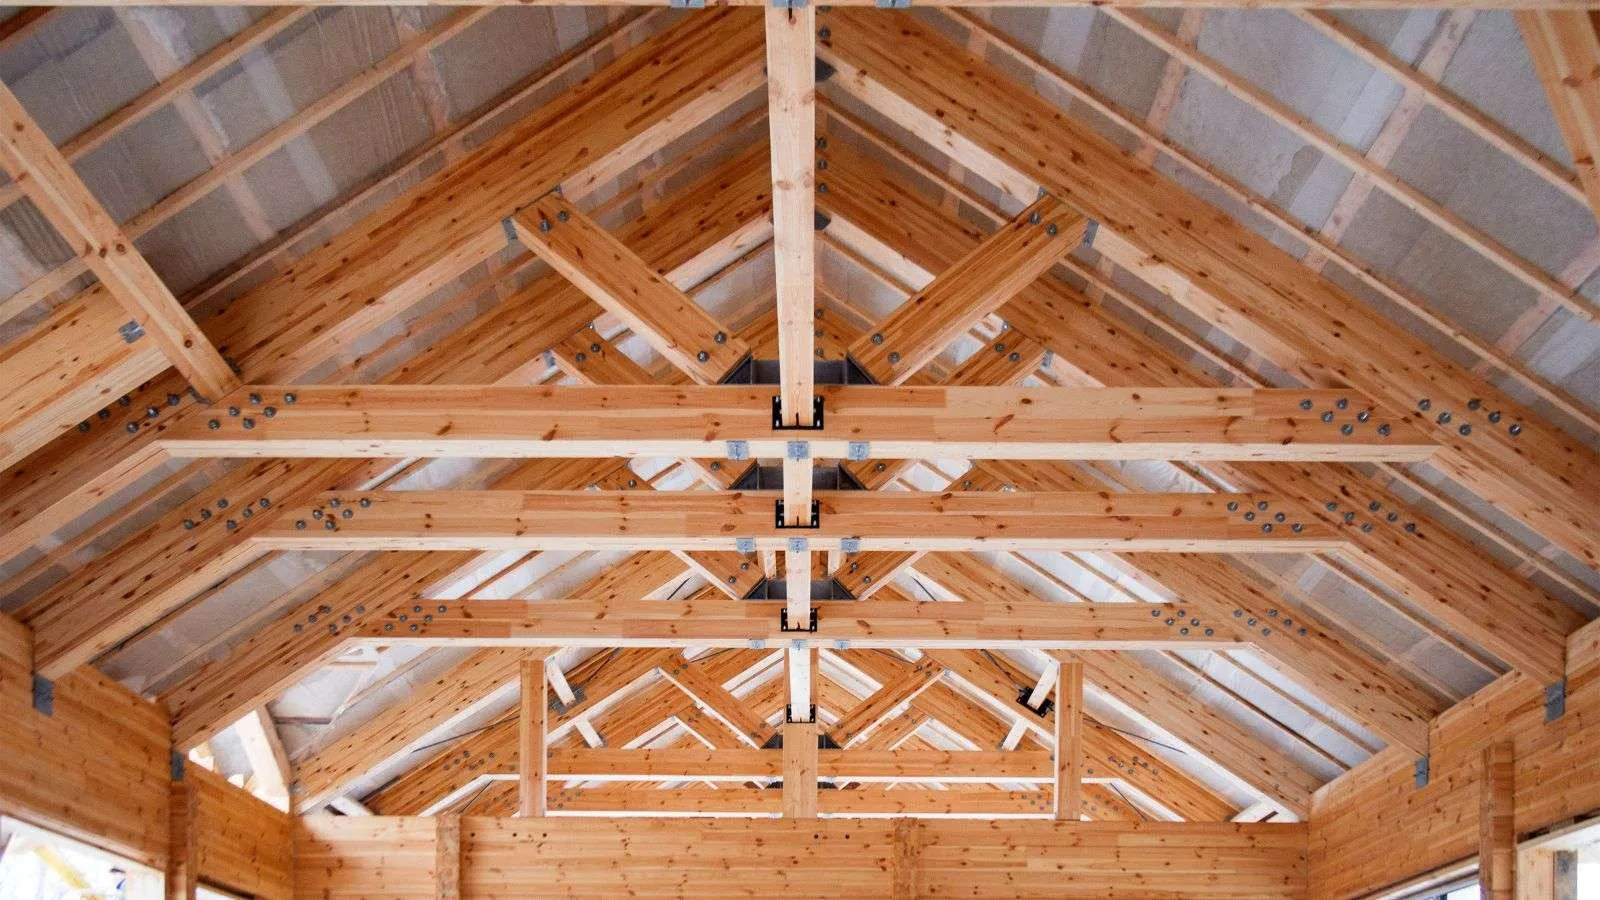
Understanding Truss Uplift
Truss uplift is a common issue that homeowners may encounter in their houses. It occurs when the wooden roof trusses expand and contract due to changes in temperature and humidity, causing the ceiling to separate from the interior walls. This can result in visible gaps, cracks, and even damage to the drywall. Fortunately, there are several effective ways to prevent truss uplift and maintain the structural integrity of your home.
One method is to install truss clips, which help secure the trusses to the interior walls. You can nail a board on top of each interior wall, extending it slightly beyond the edges. This creates a protective lip that acts as a bumper, preventing the truss from lifting excessively.
Another preventive measure is to update your insulation. By insulating against the roof plywood, you can minimize temperature and moisture differentials that contribute to truss uplift. Proper insulation helps maintain a more stable environment within the attic space.
Consider installing crown molding around the second-floor ceilings. By attaching the crown molding only to the ceilings, you allow the trusses to move independently without affecting the walls. This can alleviate stress on the trusses and reduce the likelihood of uplift.
For added support, you can utilize products like Trim-Tex’s Truss Backing Angle. This angle is installed after framing but before hanging the drywall, providing extra reinforcement and stability.
When connecting the ceiling and wall drywall, try to avoid nailing or screwing the ceiling drywall panel directly to the bottom of the trusses. Instead, use alternative methods that allow for movement while keeping the walls securely in place.
Finally, you need to disconnect the edges of walls and ceilings from the trusses. You can achieve this by floating them or connecting them with unique clips or backing made to allow truss movement while maintaining the walls’ stationary position.
6-Step Guide for Preventing Truss Uplift
1. Install Truss Clips
Truss clips are a vital component in preventing truss uplift. These metal brackets help secure the roof trusses to the interior walls, minimizing the risk of separation. When installing truss clips, check they are properly aligned and securely fastened to provide optimal support. Consider reinforcing the connection by nailing a board on top of each interior wall, extending it slightly beyond the edges. This additional lip acts as a protective bumper, further preventing truss uplift.
2. Update Insulation Against the Roof Plywood
An often overlooked aspect of preventing truss uplift is updating your insulation. By insulating against the roof plywood, you create a more balanced and consistent temperature and moisture environment within the attic space. This helps minimize the expansion and contraction of the trusses, reducing the potential for uplift. Consult with a professional to determine the appropriate insulation materials and techniques for your specific climate and home structure.
3. Install Crown Molding on Second-Floor Ceilings
Crown molding not only adds an elegant touch to your home but can also serve as a practical solution for preventing truss uplift. By attaching the crown molding solely to the second-floor ceilings, you allow the trusses to move independently without affecting the walls. This relieves stress on the trusses and helps maintain their stability. Choose crown molding designs that complement your interior aesthetics while providing the necessary support for your trusses.
4. Utilize Trim-Tex’s Truss Backing Angle
Another effective method for preventing truss uplift is incorporating Trim-Tex’s Truss Backing Angle into your construction process. This specialized product is installed after framing but before hanging the drywall. It provides extra reinforcement and stability, helping to counteract any potential lifting forces on the trusses. Consult the manufacturer’s instructions or seek professional guidance on proper installation techniques to check for maximum effectiveness.
5. Use Alternative Methods to Connect Ceiling and Wall Drywall
When connecting the ceiling and wall drywall, you need to avoid directly nailing or screwing the ceiling drywall panel to the bottom of the trusses. Instead, explore alternative methods that allow for truss movement while keeping the walls securely in place. Options include using flexible connectors or specialized clips designed to accommodate truss uplift. These alternative connections help maintain the integrity of both the ceiling and walls, minimizing the risk of visible gaps or cracks.
6. Disconnect Edges of Walls and ceilings from Trusses
To further mitigate truss uplift, it is essential to disconnect the edges of walls and ceilings from the trusses. You can accomplish this by floating them or connecting them with unique clips or backing created specifically to permit truss movement while keeping the walls still. These innovative solutions provide flexibility and resilience, ensuring that your home remains structurally sound even in the face of changing environmental conditions.
Truss Uplift Causes: What Triggers the Problem?
- Temperature and Humidity Changes: Fluctuations in temperature and humidity are the main causes of truss uplift. As wood is a natural material, it expands and contracts in response to changes in its surrounding environment. Temperature variations between the heated living spaces below and the cooler attic above can cause the top chords of the trusses to expand or contract at a different rate than the bottom chords. This discrepancy leads to the lifting of the trusses and potential separation from the interior walls.
- Inadequate Insulation: Insufficient or outdated insulation can contribute to truss uplift. Poor insulation allows temperature differentials to be more pronounced between the living spaces and the attic. Without proper insulation, warm air from the living spaces can rise into the attic, causing the trusses to expand unevenly. Upgrading insulation and ensuring a well-insulated attic can help maintain a more consistent temperature and minimize the risk of truss uplift.
- Inadequate Fastening: Improperly secured roof trusses can also be a cause of uplift. If trusses are not adequately attached to the interior walls, they may experience increased movement during temperature changes, leading to uplift. Insufficient or incorrectly installed truss clips, which are designed to secure the trusses to the walls, can also contribute to this problem. Proper installation of truss clips and ensuring a secure connection between the trusses and walls are essential to preventing uplift.
- Lack of Structural Support: The absence of additional structural elements that accommodate truss movement can exacerbate uplift. When ceilings and walls are directly connected to the trusses without any allowance for movement, the stress on the trusses increases. This lack of flexibility can lead to uplift. Installing crown molding solely on the ceilings, using alternative methods to connect drywall, or employing specialized clips or backings that allow for truss movement can provide the necessary support and alleviate stress on the trusses.
- Building Settling: Over time, buildings naturally settle due to various factors, such as soil conditions, foundation settling, or structural adjustments. Building settling can impact the alignment and stability of the trusses, potentially contributing to uplift. Regular inspection and maintenance of the building’s structural components can help identify any settling issues early on and address them appropriately.
- Construction Techniques: Inadequate construction techniques, such as improper installation of drywall or neglecting to disconnect the edges of walls and ceilings from the trusses, can also play a role in truss uplift. Following proper construction practices and utilizing specialized methods, such as floating connections or using specific clips or backing, can help minimize uplift risks.
Symptoms of Truss Uplift: How to Detect and Address It Early
- Visible Gaps or Cracks: One of the most noticeable symptoms of truss uplift is the presence of visible gaps or cracks between the ceiling and interior walls. These gaps may appear as thin separations or more pronounced openings, indicating that the trusses have lifted. Homeowners should inspect their walls and ceilings regularly for any signs of separation or cracking, especially at the corners or near the edges where truss uplift is more likely to occur.
- Uneven or Sagging Ceilings: Truss uplift can also cause ceilings to appear uneven or sagging in certain areas. This occurs when the trusses lift, pulling the ceiling away from the walls. Homeowners may observe a subtle or significant downward slope in the ceiling, which can be a clear indication of truss uplift.
- Popping or Creaking Sounds: As trusses lift and settle back into place during temperature changes, they can produce audible popping or creaking sounds. These noises can be heard predominantly during periods of extreme temperature fluctuations, such as when transitioning from cold winter nights to warm daytime temperatures. Paying attention to any unusual sounds coming from the walls or ceilings can help identify potential truss uplift issues.
- Cracked or Damaged Drywall: Truss uplift can place stress on the drywall, leading to cracks or damage. Homeowners may notice cracks forming along the seams between drywall panels or near the edges where the walls meet the ceiling. These cracks may widen and deepen over time if truss uplift is not addressed promptly.
- Sticking Doors or Windows: Truss uplift can affect the alignment of doors and windows in a home. As the trusses lift and cause the walls to shift slightly, it can result in doors and windows becoming misaligned. Homeowners may experience difficulty opening or closing doors or notice that windows no longer operate smoothly. This symptom, along with the other signs mentioned above, can indicate the presence of truss uplift.
Building Techniques to Avoid Truss Uplift
- Proper Truss Installation: Ensuring proper truss installation is important in preventing truss uplift. Trusses should be installed according to the manufacturer’s guidelines and in compliance with local building codes. This includes proper spacing, alignment, and secure fastening to the interior walls. Following the recommended installation techniques helps maintain the stability of the trusses and minimizes the risk of uplift.
- Use of Truss Clips or Brackets: Incorporating truss clips or brackets during construction provides additional support and helps prevent truss uplift. These metal connectors are specifically designed to secure the trusses to the interior walls, reducing the likelihood of separation. Truss clips or brackets should be installed at appropriate intervals, as recommended by the manufacturer for optimal effectiveness.
- Flexible Drywall Connections: Using flexible connections between drywall panels and the trusses can help accommodate truss movement and reduce the risk of uplift. Instead of directly attaching the drywall to the trusses, consider using flexible connectors or specialized clips that allow for slight movement. This makes sure that the drywall remains securely attached while allowing the trusses to expand and contract without causing stress or separation.
- Insulation and ventilation: Proper insulation and ventilation play a significant role in preventing truss uplift. Well-insulated attics help maintain a more consistent temperature, minimizing temperature differentials that contribute to uplift. Adequate ventilation helps regulate moisture levels, reducing the potential for wood expansion and contraction. Proper insulation installation techniques and ventilation strategies should be implemented to create a balanced environment within the attic space.
- Professional Consultation: Seeking professional consultation from qualified contractors or engineers during the design and construction phases can help confirm that proper techniques are employed to prevent truss uplift. Professionals can provide valuable insights, recommend appropriate materials and methods, and oversee the construction process to minimize the risk of uplift. Their expertise can help identify potential issues early on and implement effective preventive measures.
The Role of Moisture in Truss Uplift
Moisture plays a significant role in truss uplift as it can lead to the expansion and contraction of wood, contributing to the lifting of roof trusses. Fluctuations in moisture levels within the attic space can cause the wood to swell or shrink, affecting the dimensions of the trusses.
For instance, during periods of high humidity, the wood may absorb moisture and expand, while drier conditions can cause the wood to contract. These changes can create tension within the trusses, leading to uplift. Proper insulation and ventilation are essential in managing moisture levels, as they help maintain a balanced environment within the attic.
Importance of Regular Inspections to Identify Early Signs of Truss Uplift
Regular inspections are key for identifying early signs of truss uplift and addressing potential issues before they escalate. By conducting periodic visual checks of the ceilings, walls, and attic space, homeowners can detect symptoms such as visible gaps, cracks, or unevenness that may indicate truss uplift.
Paying attention to any unusual sounds, such as creaking or popping noises, and monitoring the condition of the drywall can provide valuable indicators of uplift. Early detection through thorough inspections allows for timely intervention, preventing further damage and minimizing the impact on the structural integrity of the home.
Engaging professional contractors or engineers to perform comprehensive inspections can offer in-depth assessments and recommendations for implementing preventive measures to address truss uplift effectively.
Understanding Plaster Cracks: Truss Uplift Consequences
Truss uplift can lead to consequences such as plaster cracks, which are indicative of the separation between the ceiling and interior walls. As the roof trusses experience movement due to temperature and humidity changes, the ceiling may lift away from the walls, resulting in visible cracks in the plaster.
These cracks are often observed near the edges of the ceiling, where truss uplift is most prominent. Plaster may exhibit signs of stress, such as flaking or bulging, as a direct result of the uplift. Addressing truss uplift is vital to prevent further damage to the plaster and maintain the aesthetic appeal of the interior spaces.
Tools and Techniques: Fighting Truss Uplift Effectively
- Truss Clips and Brackets: Installing truss clips and brackets provides essential reinforcement to secure the roof trusses to the interior walls, reducing the risk of uplift. These metal connectors are designed to maintain the connection between the trusses and walls, minimizing movement and potential separation. Properly installed truss clips and brackets help distribute the forces exerted on the trusses, enhancing stability and preventing uplift.
- Specialized Insulation Techniques: Utilizing specialized insulation techniques, such as insulating against the roof plywood, helps create a more stable temperature and moisture environment within the attic space. This minimizes the expansion and contraction of the trusses, reducing the likelihood of uplift. Employing advanced insulation materials and methods tailored to specific climate conditions can significantly contribute to fighting truss uplift.
- Flexible Drywall Connections: Using flexible connections between the drywall and trusses allows for truss movement while maintaining a secure attachment. Flexible connectors or specialized clips accommodate the natural expansion and contraction of the trusses, reducing stress on the drywall and minimizing the risk of visible cracks or separation. By implementing flexible drywall connections, homeowners can effectively combat the impact of truss uplift.
- Professional Consultation and Inspection: Engaging professional contractors or engineers for regular inspections and consultations provides valuable insights into identifying early signs of truss uplift and implementing effective preventive measures. Professionals can assess the structural integrity of the home, recommend appropriate tools and techniques, and oversee the implementation of preventive strategies to combat uplift. Their expertise and guidance are vital in fighting truss uplift effectively.
- Innovative Products like Trim-Tex’s Truss Backing Angle: Incorporating innovative products such as Trim-Tex’s Truss Backing Angle provides additional reinforcement to counteract potential lifting forces on the trusses. This specialized product, installed after framing but before hanging the drywall, enhances stability and resilience, contributing to the effective prevention of truss uplift. By leveraging advanced products specifically designed to address uplift concerns, homeowners can reinforce their efforts to combat truss uplift effectively.
Professional Assistance: When Do You Need It?
Professional assistance is essential when dealing with complex structural issues such as truss uplift. Homeowners should seek professional guidance and expertise when they observe persistent symptoms of truss uplift, such as visible cracks, uneven ceilings, or unusual sounds, despite implementing preventive measures.
If there are concerns about the structural integrity of the home or if advanced tools and techniques need to be employed, consulting qualified contractors or engineers is advisable. Professional assistance becomes especially needed when planning significant home renovation or construction projects that involve addressing truss uplift.
In such cases, professionals from our website directory, Big Home Projects, can provide specialized services and expertise in structural assessments, preventive strategies, and the implementation of effective solutions to combat truss uplift and maintain the long-term stability of the home.
Exploring Future Trends in Truss Design and Uplift Prevention
Future trends in truss design and uplift prevention are likely to focus on advanced materials and technologies that enhance structural stability and resilience while addressing the challenges of truss uplift. Innovations in composite materials, such as carbon fiber or advanced polymers, may offer increased strength and flexibility, providing a more robust solution to combat uplift.
The integration of smart sensors and monitoring systems within truss structures can enable real-time detection of uplift-related movements, allowing for proactive intervention before significant damage occurs. Furthermore, advancements in insulation materials and techniques, as well as developments in energy-efficient construction practices, may contribute to creating more stable attic environments, reducing the impact of temperature and moisture differentials on truss uplift.
Embracing sustainable and resilient design principles, coupled with advancements in material science and construction technologies, is expected to drive future trends in truss design and uplift prevention, ensuring the longevity and stability of residential structures.