Fascia plays a major role in the structure and appearance of your roof, acting as a key element in protecting the roof and the interior of your home from moisture damage. It also provides a clean, finished look and is essential for the support of gutters.
In this article, we dive into the key steps to make sure your roof’s fascia is properly installed, guaranteeing durability and enhancing your home’s aesthetic appeal.
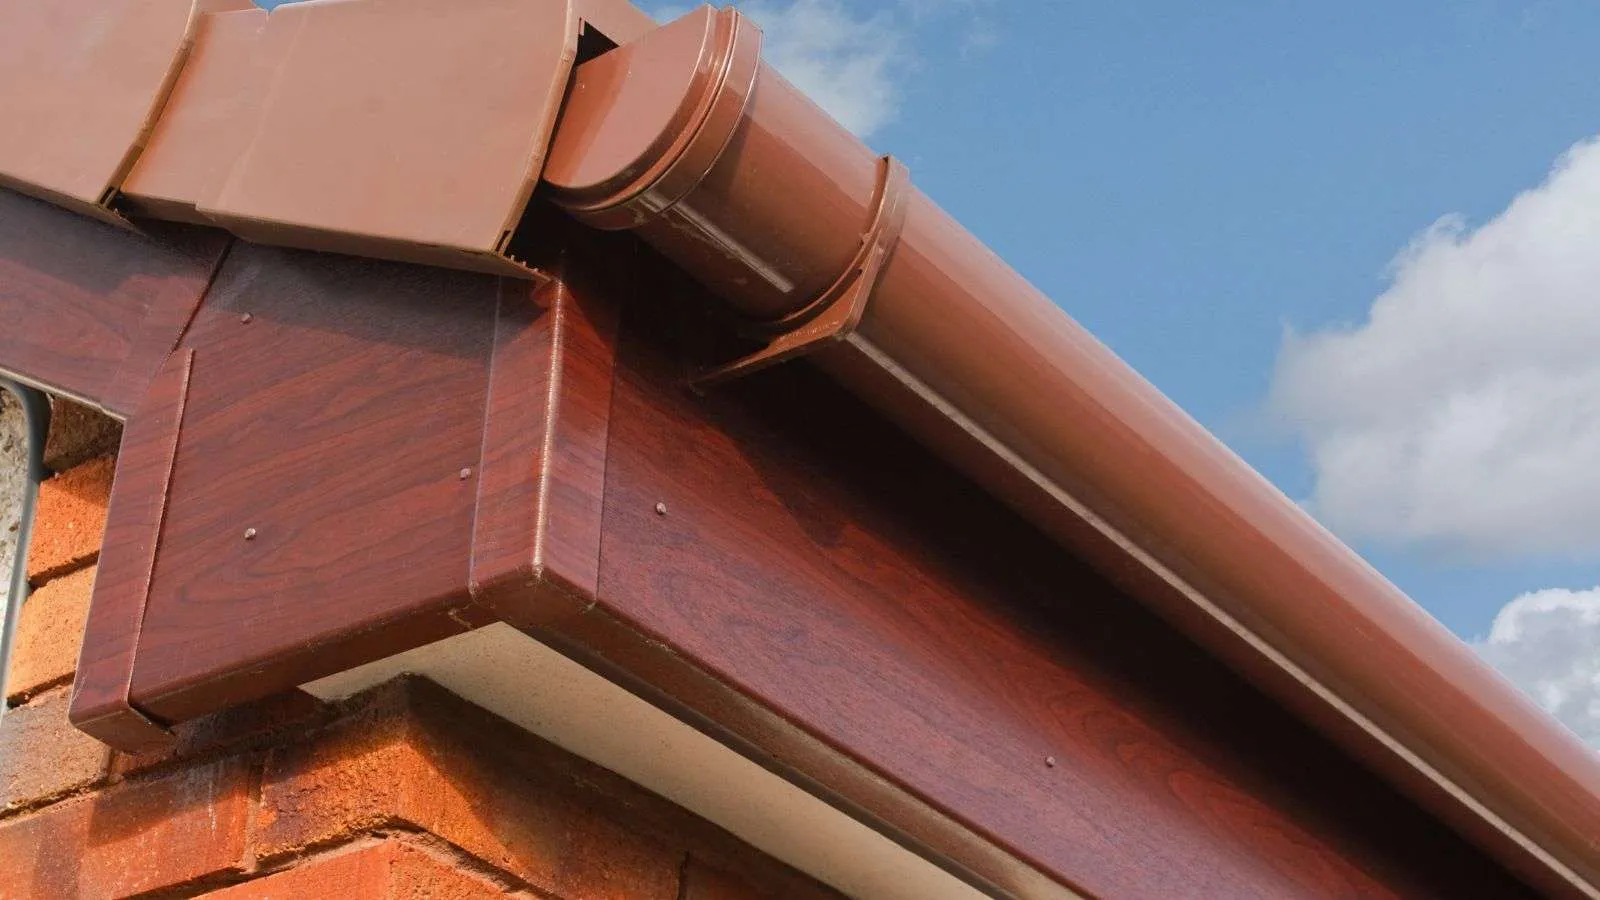
Understanding the Role and Importance of Roof Fascia
The roof fascia plays a major role in the overall structure of a building, serving both functional and aesthetic purposes. Functionally, the fascia board provides support for the lower edge of the roof, offering a smooth, even surface for attaching gutters and drainage systems. It helps to protect the roof and the interior of the building from water damage by preventing water from seeping into the eaves and walls.
The fascia board helps to create a finished look for the roof, enhancing the curb appeal of the building. Without a properly installed and maintained fascia, water can infiltrate the roof structure, leading to rot, mold, and other costly damages. To illustrate, a well-designed fascia system can complement the architectural style of a house, adding character and visual interest. Overall, the roof fascia is an essential component that should not be overlooked in building construction and maintenance.
11 Critical Steps for Proper Fascia Installation
1. Proper Measurement and Preparation
Before beginning the installation process, it’s best to accurately measure the length of the fascia boards needed. Take into account any corners or angles that may require special cuts. Make sure the surface where the fascia will be installed is clean, smooth, and free of debris to promote a secure attachment.
2. Correct Material Selection
Choosing the right material for the fascia boards is essential for longevity and durability. Consider materials such as PVC, wood, or composite based on your budget, climate conditions, and desired aesthetics. Selecting high-quality materials will help prevent premature deterioration and reduce maintenance needs over time.
3. Proper Ventilation
Incorporating ventilation into the fascia installation is often overlooked but crucial for maintaining a healthy roof system. Adequate ventilation helps regulate temperature and moisture levels in the attic, preventing issues like mold growth and premature roof deterioration. Just make sure that ventilation slots or systems are included in the fascia design.
4. Attaching the Fascia Securely
Securely attaching the fascia boards to the roof rafters is vital for structural integrity. Use corrosion-resistant screws or nails to fasten the boards at regular intervals, ensuring a tight fit that can withstand wind, rain, and other external elements. Proper attachment will prevent sagging or warping over time.
5. Seamless Corners and Joints
Creating seamless corners and joints between fascia sections enhances both the visual appeal and functionality of the installation. Use precision cuts and appropriate joining techniques to maintain a tight and professional finish. Properly sealed corners and joints will prevent water infiltration and improve the overall aesthetics of the roofline.
6. Painting or Sealing
Applying a protective coating, paint, or sealant to the fascia boards can extend their lifespan and enhance their resistance to moisture, UV rays, and other environmental factors. Choose a high-quality product suitable for the material of your fascia boards and follow manufacturer recommendations for application and maintenance.
7. Regular Inspection and Maintenance
Regularly inspecting the fascia boards for signs of damage, wear, or pest infestation is essential for early detection and timely repairs. Schedule routine maintenance tasks such as cleaning gutters, removing debris, and checking for loose fasteners so that the fascia remains in optimal condition and protects the roof structure effectively.
8. Proper Drainage Design
Ensuring proper drainage design is integrated into the fascia installation is essential for preventing water buildup and potential damage. Position gutters and downspouts strategically to direct water away from the roof and foundation, minimizing the risk of leaks, erosion, and structural issues caused by water infiltration.
9. Pest Prevention Measures
Using pest prevention strategies when installing fascia can help prevent damage to the roof structure from insects, birds, or rodents. Try using pest-resistant materials, installing screens or barriers, and sealing any entry points to deter unwanted pests from nesting or causing harm to the fascia boards.
10. Professional Installation Assistance
Seeking professional assistance for complex or large-scale fascia installations can help with optimal results and long-term performance. Experienced contractors have the expertise, tools, and resources to handle intricate details, challenging configurations, and specialized requirements efficiently. Consult with reputable professionals to maintain a successful and hassle-free installation process.
11. Environmental Considerations
Taking environmental factors into account when installing fascia boards can contribute to sustainability and eco-friendliness. Choose materials that are sourced responsibly, consider energy-efficient design options, and explore green building practices to minimize environmental impact and promote a healthier living environment. Prioritize eco-conscious choices throughout the installation process to create a more sustainable roof system that benefits both your property and the planet.
Selecting the Right Materials for Your Roof’s Fascia
Selecting the right materials for your roof’s fascia is the key to ensuring durability, functionality, and aesthetics. Consider factors such as weather resistance, maintenance requirements, cost, and design preferences when choosing between options like PVC, wood, aluminum, or composite materials. PVC fascia boards offer excellent weather resistance and low maintenance, making them a popular choice for homeowners seeking durability and longevity.
Wood fascia provides a classic look but requires more upkeep to prevent rot and deterioration over time. Aluminum fascia combines strength with lightweight properties, making it ideal for areas prone to high winds or moisture. Composite materials offer a balance of durability and aesthetics and are often made from recycled components for eco-friendly construction. Select materials that align with your specific needs and priorities to maintain a successful and long-lasting fascia installation for your roof.
Pre-installation Considerations: What You Need to Know
- Climate Considerations: Before installing the roof fascia, it’s essential to take into account the climate of your region. Different materials may perform better in specific climates; for example, PVC is more resistant to moisture in humid areas, while aluminum is ideal for locations prone to high winds. Understanding how the local climate can impact the longevity and maintenance needs of your fascia will help you make an informed decision.
- Architectural Style Compatibility: Consider the architectural style of your home when selecting fascia materials. Choose materials that complement the overall aesthetic of the property to enhance its curb appeal. For instance, wood fascia may be well-suited for traditional or rustic-style homes, while sleek aluminum or composite materials can complement modern architectural designs.
- Budget and Long-Term Costs: Evaluate your budget constraints and the long-term costs associated with different fascia materials. While PVC may have a higher initial cost, its low maintenance requirements can result in cost savings over time compared to wood, which may require more frequent upkeep. Factor in not just the upfront expenses but also the potential maintenance costs in the future.
- Sustainability and Environmental Impact: Consider the environmental impact of the materials you choose for your roof fascia. Opt for eco-friendly options like composite materials made from recycled components or sustainably sourced wood to minimize your carbon footprint. Prioritizing sustainability in your material selection can contribute to a greener and more responsible construction process.
- Installation Complexity and Expertise: Assess the complexity of the fascia installation process and determine whether you have the necessary expertise to handle it yourself or if professional assistance is required. Intricate designs, challenging configurations, or specific requirements may benefit from the skills and experience of a professional contractor to maintain a successful and durable installation. Prioritize safety and quality by seeking expert help when needed.
The Impact of Weather Conditions on Fascia Installation
- Moisture Exposure: Weather conditions, particularly moisture exposure, can significantly impact fascia installation. Choose materials like PVC or aluminum that are resistant to moisture if you live in a rainy or humid climate to prevent deterioration and rot. Proper sealing and maintenance are essential to protect the fascia from water damage over time.
- Temperature Fluctuations: Extreme temperature fluctuations can affect the expansion and contraction of fascia materials, leading to warping or cracking. Select materials that can withstand temperature changes, such as composite boards that are designed to be more stable in varying climates. Proper installation techniques, including allowing for thermal expansion, can help mitigate the effects of temperature shifts on the fascia.
- UV Exposure: Prolonged exposure to sunlight and UV rays can cause fading, discoloration, and degradation of certain fascia materials. Consider materials with UV-resistant properties, such as PVC or composite boards with protective coatings, to maintain the appearance and structural integrity of the fascia over time. Regularly inspecting and maintaining the fascia can help identify and address any UV-related issues immediately.
- Wind Resistance: Strong winds can exert pressure on the fascia boards, especially in areas prone to storms or high wind speeds. Just make sure there is proper installation with secure fastenings and consider materials like aluminum known for their strength and durability in windy conditions. Strategic placement of downspouts and gutters can help divert wind-driven rain away from the fascia to reduce potential damage.
- Snow Load Considerations: In regions with heavy snowfall, the weight of accumulated snow on the roof can impact the fascia’s structural integrity. Choose materials that can support the snow load without bending or breaking, such as sturdy aluminum or composite fascia boards. Properly maintaining gutters and ensuring efficient drainage can prevent ice dams and reduce the risk of snow-related damage to the fascia.
Tools and Equipment Needed for Fascia Installation
- Measuring Tools: Accurate measurements are crucial for a successful fascia installation. Essential measuring tools include a tape measure, square, and level to ensure precise cuts and proper alignment of the fascia boards. Using quality measuring tools will help avoid errors and ensure a professional finish to the installation.
- Cutting Tools: Various cutting tools are needed to trim fascia boards to the required lengths and angles. Common cutting tools for fascia installation include a circular saw, miter saw, or table saw for straight cuts, and a coping saw or jigsaw for more intricate shapes or corners. Selecting the appropriate cutting tool for the material and angle needed will result in clean and accurate cuts.
- Fastening Equipment: Securely fastening the fascia boards is essential for their stability and longevity. Depending on the material used, choose corrosion-resistant screws, nails, or fasteners to attach the fascia to the roof rafters securely. A drill or nail gun can be used to drive fasteners into place efficiently and effectively.
- Sealing and Adhesive Products: Sealants and adhesives play a critical role in protecting the fascia from moisture infiltration and enhancing its durability. Silicone sealant or construction adhesive can be used to seal joints, corners, and seams to prevent water penetration and improve the overall weather resistance of the installation. Just make sure to use products recommended for the specific material of your fascia boards.
- Safety Gear: Prioritize safety during fascia installation by wearing appropriate safety gear, including gloves, safety glasses, and a dust mask, to protect against debris and potential hazards. Consider using a sturdy ladder or scaffolding for safe access to high areas when working on the roof fascia. Safety should always be a top priority when handling tools and equipment during the installation process.
Step-by-Step Guide to Installing Fascia on Your Roof
- Preparation and Measurement Begin by measuring the length of the fascia needed and preparing the work area. Just make sure the surface is clean, smooth, and free of debris before starting the installation process. Make precise measurements, accounting for any corners, angles, or joints that may require special cuts.
- Material Selection and Cutting: Choose the appropriate fascial material based on your preferences and climate considerations. Use cutting tools such as a circular saw or miter saw to trim the fascia boards to the required lengths and angles. Just make sure to make accurate cuts for a seamless fit during installation.
- Fastening the Fascia Boards Securely fasten the fascia boards to the roof rafters using corrosion-resistant screws, nails, or fasteners. Start at one end and work your way along the length of the roof, ensuring each board is tightly attached. Maintain consistent spacing between fasteners for structural stability.
- Sealing and Adhering Joints: Apply sealant or construction adhesive to seal joints, corners, and seams between fascia boards. This helps prevent water infiltration and enhances the weather resistance of the installation. Use a caulking gun to apply the sealant evenly along the edges for a watertight seal.Finishing Touches and Painting Complete the installation by adding finishing touches, such as painting or sealing the fascia boards. Choose a high-quality paint or sealant suitable for the material used to protect against UV rays, moisture, and other environmental factors. Just make sure the paint or sealant application is even and thorough for long-lasting protection.
- Inspection and Maintenance: Once the fascia installation is complete, inspect the boards for any signs of damage, loose fasteners, or gaps in sealing. Address any issues immediately to prevent water damage and ensure the structural integrity of the roof fascia. Schedule regular maintenance tasks such as cleaning gutters and reapplying sealant as needed to prolong the lifespan of the fascia.
Professional vs. DIY: Making the Right Choice for Fascia Installation
| Aspect | Professional Installation | DIY Installation |
|---|---|---|
| Expertise | Experienced contractors have the skills and knowledge to handle complex installations efficiently and make sure high-quality results. | DIYers may lack the expertise needed for intricate details, leading to potential errors or challenges during the installation. |
| Time | Professionals can complete the installation in a shorter timeframe, minimizing disruptions and ensuring a timely finish. | DIY installations may take longer due to learning curves, potential mistakes, and balancing the project with other responsibilities. |
| Cost | Professional installation costs typically include labor, materials, and equipment, with average prices ranging from $1,500 to $3,500. | DIY installations can be more cost-effective, with material expenses ranging from $500 to $1,500, but may require additional tools or resources. |
| Quality of Workmanship | Professionals deliver a high standard of workmanship, ensuring precise cuts, proper sealing, and long-lasting results. | DIY results can vary based on individual skill levels and attention to detail, with potential quality differences compared to professional work. |
When considering whether to opt for a professional or DIY fascia installation, several key aspects should be carefully weighed. Professional installation offers expertise, efficient time management, and high-quality workmanship but comes at a higher cost, typically ranging from $1,500 to $3,500.
On the other hand, DIY installation can be more budget-friendly, with material expenses ranging from $500 to $1,500; however, it may require more time investment and could result in varied quality depending on individual skills. It’s essential to assess your skill level, available time, budget constraints, and desired outcome to make an informed decision that aligns with your priorities and resources.
Common Mistakes to Avoid in Fascia Installation
- Improper Measurement and Preparation: One common mistake to avoid is inaccurate measurement and inadequate preparation before installing fascia. Failing to measure correctly or neglecting to prepare the work area can result in misaligned boards, gaps, or unnecessary cuts during installation. Take the time to measure accurately and make sure the surface is clean, level, and ready for the installation process.
- Inadequate Fastening and Support: Improper fastening of fascia boards or inadequate support can lead to structural instability and potential damage over time. Using insufficient or incorrect fasteners, spacing them unevenly, or neglecting to secure the boards properly to the roof rafters can result in sagging, warping, or detachment of the fascia. Just make sure there is secure fastening and adequate support for a durable installation.
- Neglecting Sealing and Weatherproofing: Neglecting to seal joints, corners, or seams between fascia boards leaves them vulnerable to water infiltration, moisture damage, and weather-related issues. Proper sealing with sealants or adhesives is essential to prevent water penetration and enhance the longevity of the fascia installation. Just make sure all joints are adequately sealed to protect the boards from environmental elements.
- Ignoring Safety Precautions: Safety should always be a top priority during fascia installation to prevent accidents or injuries. Neglecting to use appropriate safety gear, such as gloves, safety glasses, or a dust mask, can result in personal harm while working with tools and equipment. Using unstable ladders or working at heights without proper precautions can lead to dangerous situations. Prioritize safety measures throughout the installation process.
- Skipping Regular Maintenance: Another common mistake is neglecting regular maintenance of the fascia once installed. Failure to inspect the boards for damage, loose fasteners, or sealing issues can lead to water damage, rot, or structural issues over time. Schedule routine maintenance tasks such as cleaning gutters, reapplying sealant, and checking for any signs of wear so that the fascia remains in optimal condition and effectively protects the roof structure.
Maintenance Tips to Extend the Life of Your Roof’s Fascia
- Regular Cleaning: Regularly clean the fascia boards to remove debris, dirt, and buildup that can contribute to moisture retention and deterioration. Use a gentle cleanser, a soft brush, or a sponge to clean the surface effectively without damaging the material. Keeping the fascia clean helps prevent mold growth, rot, and other issues caused by trapped debris.
- Inspect for Damage: Routinely inspect the fascia for signs of damage, such as cracks, peeling paint, or pest infestation. Address any issues immediately to prevent further deterioration and maintain the structural integrity of the fascia. Look for water stains, discoloration, or sagging areas that may indicate underlying problems requiring immediate attention.
- Maintain Sealant and Paint: Check the sealant and paint on the fascia boards regularly so that they are intact and providing adequate protection against moisture and UV exposure. Reapply sealant or touch-up paint as needed to maintain a protective barrier and enhance the longevity of the fascia. Properly sealed and painted fascia boards are more resistant to weather-related damage.
- Clear Gutters and Downspouts: Maintain clear gutters and downspouts to get the right drainage and prevent water buildup that can damage the fascia. Remove leaves, debris, and blockages regularly to allow rainwater to flow freely away from the roofline. Clogged gutters can lead to overflow, water infiltration, and potential damage to the fascia and roof structure.
- Trim Overhanging Branches: Trim back overhanging branches or vegetation near the roof to prevent contact with the fascia. Branches rubbing against the fascia can cause scratches, abrasions, or damage over time. Keeping vegetation trimmed away from the roofline reduces the risk of physical damage and minimizes potential maintenance needs for the fascia.
The Aesthetic Impact of Properly Installed Fascia on Your Home
Properly installed fascia can have a significant aesthetic impact on your home, enhancing its overall appearance and curb appeal. Well-maintained fascia creates a clean and polished look to the roofline, contributing to the architectural harmony and visual appeal of the property. The fascia serves as a finishing touch that complements the style of the house, adding character and definition to the roof structure.
Coordination of the color and design of the fascia with other exterior elements, such as siding or trim, can create a cohesive and attractive facade. Aesthetically pleasing fascia not only elevates the exterior aesthetics of the home but also conveys a sense of care and attention to detail, making a positive impression on visitors and passersby.
Navigating Local Building Codes and Regulations for Fascia Installation
Navigating local building codes and regulations for fascia installation is essential to guarantee compliance with safety standards and legal requirements. Building codes can vary by region and may dictate specific guidelines regarding materials, dimensions, attachment methods, and structural integrity for fascia installations. You have to research and understand the relevant regulations in your area before beginning the installation process to avoid potential fines, delays, or the need for costly corrections.
Consulting with local authorities, building inspectors, or professionals familiar with local codes can provide valuable guidance and help you navigate any specific requirements or restrictions that apply to fascia installation in your region. Adhering to building codes and regulations can help ensure a safe, structurally sound, and code-compliant fascia installation that meets the standards set forth by local authorities.