
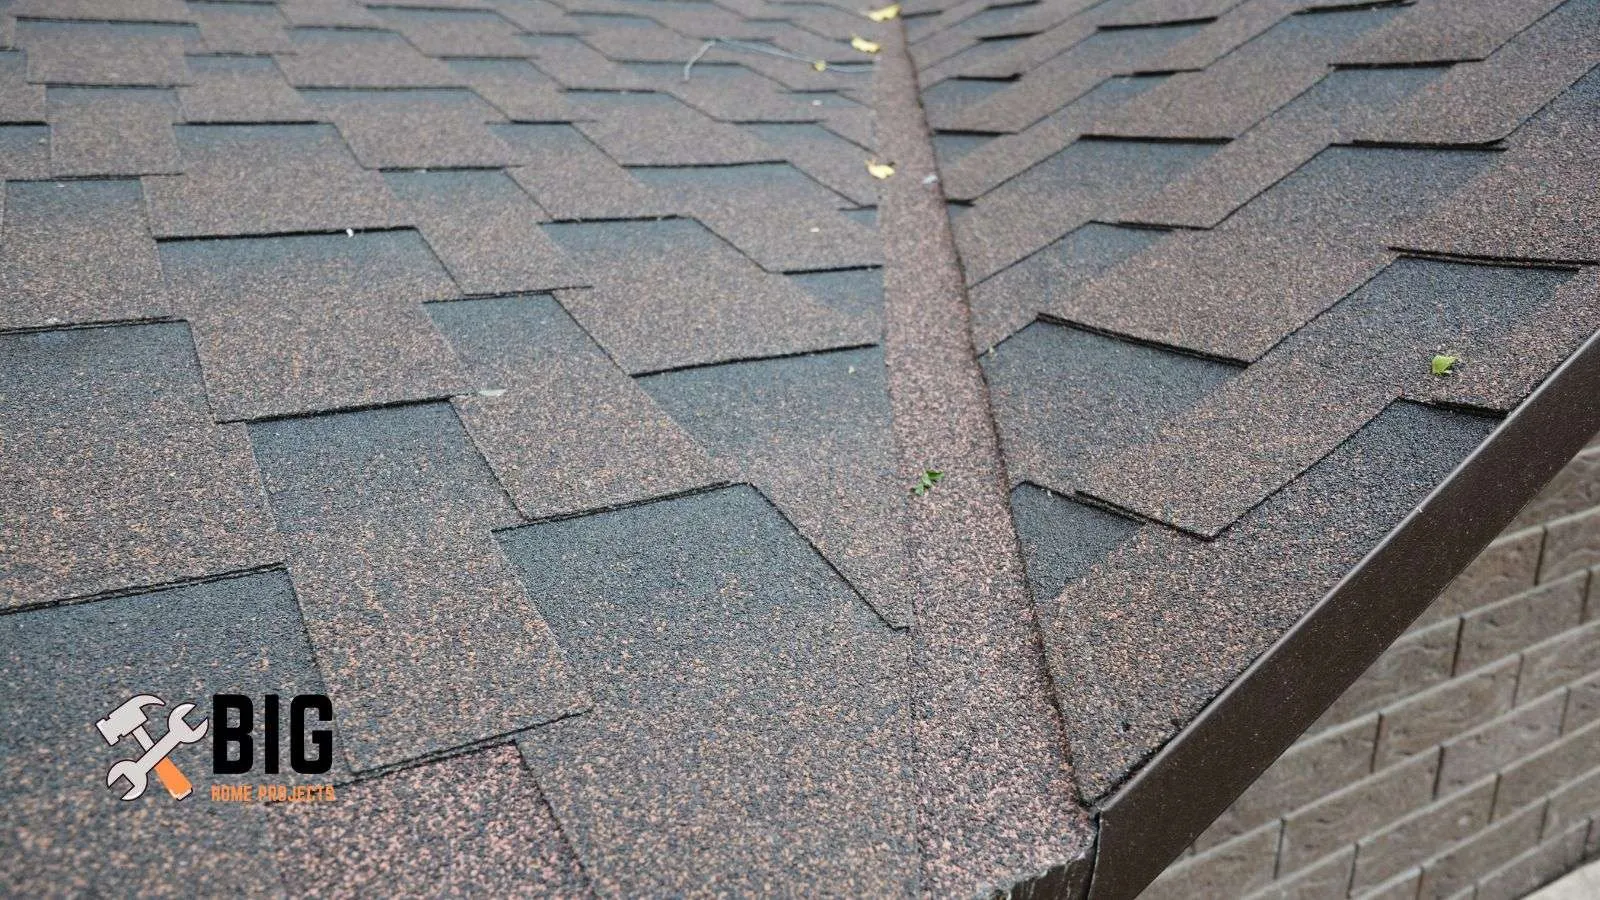
You’ve probably noticed them on the roofs of your favorite houses, but you’ve also probably never thought much about what a roof valley is or why you might need one!
Well, today we’re going to change all that. We’re going to get into what a roof valley is, how it works, and what kinds of roof valleys are available for your home.
What is a roof valley?
A roof valley is a V-shaped channel that is formed where two sloping roof planes meet.
It is typically created when two sections of a roof are joined together at an angle, such as at the intersection of two gable roofs or at the junction of a dormer and the main roof.
Roof valleys play an important role in directing rainwater and snowmelt away from the roof and into the gutters, preventing water damage to the structure of the building.
Valleys can be made from a variety of materials, including metal, shingles, or tiles, and are often reinforced with flashing to provide additional protection against water intrusion.
What are the benefits of a roof valley?
- Directing water runoff: Roof valleys provide a channel for rainwater and melted snow to flow off the roof and into the gutters, which helps to prevent water damage to the roof and the building’s structure.
- Reducing debris buildup: By providing a clear path for water runoff, roof valleys can help prevent the buildup of leaves, twigs, and other debris on the roof, which can cause damage and clog gutters.
- Reinforcing the roof structure: By creating a stronger joint between two roof planes, roof valleys can help reinforce the roof structure and prevent damage from wind and other weather-related hazards.
- Aesthetics: Depending on the type of valley and the roofing materials used, a roof valley can add visual interest to the roof and enhance the overall appearance of the building.
What types of roof valleys can I get for my home?
- Open valleys: Open valleys are the most common type of roof valley and are formed by placing metal or other material over the joint between two roof planes. The valley is left exposed to the elements, with the shingles or other roofing materials installed on either side of the valley.
- Closed valleys: Closed valleys, also known as shingle-over valleys, are formed by weaving the shingles of one roof plane over the valley and then weaving the shingles of the other roof plane over that layer. The valley is then covered with metal flashing for added protection.
- Woven valleys: Woven valleys are similar to closed valleys but are formed by alternating shingles from each roof plane to create a woven pattern. This type of valley provides good protection against water intrusion and debris buildup.
- Cut valleys: Cut valleys are formed by cutting a channel into the roof deck and placing metal flashing in the channel. This type of valley is less common and can be more challenging to install, but it provides good protection against water intrusion and debris buildup.
What is the difference between open and closed roof valleys?
Open valleys
Open valleys, also known as exposed valleys, are formed by placing metal or other material over the joint between two roof planes.
The valley is left exposed to the elements, with the shingles or other roofing materials installed on either side of the valley.
Some of the pros of open valleys include that they are easy to install and cost-effective.
Since they require less material than closed valleys, they can be a more cost-effective option.
Also, open valleys provide a clear path for water runoff, which can help prevent water damage to the roof.
However, open valleys also have some cons. Since the valley is exposed, there is less protection against debris buildup or other potential sources of damage.
Open valleys are more visible than closed valleys, which some homeowners may find less aesthetically pleasing.
If the valley is not installed correctly or if the flashing is damaged, there is a greater risk of leaks and water damage.
Closed valleys
Closed valleys, also known as shingle-over valleys, are formed by weaving the shingles of one roof plane over the valley and then weaving the shingles of the other roof plane over that layer.
The valley is then covered with metal flashing for added protection.
Some of the pros of closed valleys include better protection against debris buildup, water intrusion, and other potential sources of damage.
Also, closed valleys are less visible than open valleys, which some homeowners may find more aesthetically pleasing.
Because they provide better protection against damage, closed valleys may have a longer lifespan than open valleys.
However, closed valleys also have some cons.
They require more materials and a more complex installation process, which can increase the cost and time required for installation.
Closed valleys may not provide as clear a path for water runoff as open valleys, which can increase the risk of water damage to the roof.
Why is it important to choose the right valley for your roof?
Protection against water damage
A well-designed and properly installed roof valley will provide a clear path for water runoff and help prevent water from penetrating the roof deck, which can cause significant damage to the roof structure and the interior of the building.
Protection against debris buildup
The right type of valley can also help prevent the buildup of leaves, twigs, and other debris on the roof, which can clog gutters and cause damage to the roof structure.
Aesthetics
The type of valley you choose can also have an impact on the appearance of your roof. A well-designed and properly installed valley can enhance the overall look of your roof and improve the curb appeal of your home.
Longevity
The right type of valley can also help extend the lifespan of your roof. A well-designed and properly installed valley can provide additional protection against weather-related hazards and prevent premature wear and tear on the roof structure.
How to install shingles on a roof valley
Installing shingles on a roof valley requires careful attention to detail and proper technique to ensure a watertight seal. Here are the general steps involved in installing shingles on a roof valley:
- Prepare the roof valley: First, clear the valley of any debris and ensure that it is clean and dry. Install ice and water shield, if needed, as an extra layer of protection against water penetration.
- Install the valley flashing: Install a metal flashing strip down the center of the valley, following the contour of the roof. The flashing should extend up the roof slope on both sides of the valley, and it should be secured with roofing nails.
- Cut the shingles: Cut shingles to the correct size for the valley, taking care to account for the angle and width of the valley. Use a chalk line to mark the shingles for cutting, and use a roofing knife or shears to make the cuts.
- Install the shingles: Start at the bottom of the valley and work your way up, installing shingles on one side of the valley at a time. Overlap each shingle over the flashing and nail it in place with roofing nails. Install the shingles in a stair-step pattern, working up the valley.
- Seal the valley: Once all the shingles are installed, apply roofing cement to the top of the flashing, covering the nail heads and seams. This will create a watertight seal and help prevent leaks.
- Repeat on the other side: Once the first side of the valley is complete, repeat the process on the other side, using the same technique to install the shingles and flashing.
What is the best flashing material for a roof valley?
- Galvanized steel: Galvanized steel flashing is a popular choice for roof valleys due to its durability, affordability, and ability to resist corrosion. It can be painted to match the roofing material and is relatively easy to install.
- Aluminum: Aluminum flashing is another popular choice for roof valleys. It is lightweight, corrosion-resistant, and easy to work with. It is also available in a variety of colors to match the roofing material.
- Copper: Copper flashing is a high-end option that is popular for its durability and aesthetic appeal. It can last for many years without corroding and can add an attractive accent to the roof.
- Lead: Lead flashing has been used for centuries and is known for its durability and ability to withstand extreme weather conditions. However, it is less common today due to environmental concerns.
What are the potential damages that can happen to a roof valley?
Water damage
One of the most common issues with roof valleys is water damage. If the valley is not properly designed or installed, or if it becomes clogged with debris, water can pool and seep through the roof deck, causing damage to the roof structure and the interior of the building.
Debris buildup
Debris such as leaves, twigs, and other materials can accumulate in the valley, which can clog the flow of water and cause water to pool on the roof. This can lead to damage to the roof structure and the interior of the building.
Improper installation
If the valley is not properly installed, it can lead to leaks, water damage, and premature wear and tear on the roof structure. This can be caused by improper flashing, improper shingle alignment, or other installation issues.
Wear and tear
Over time, the valley can become worn and damaged due to exposure to the elements, especially if it is not properly maintained. This can lead to leaks, water damage, and other issues.
Weather-related damage
Severe weather, such as heavy rain, wind, hail, or snow, can cause damage to the roof valley, especially if it is not properly designed or installed.
Do roof valleys require special maintenance?
Roof valleys require special maintenance to ensure they function properly and prevent damage to the roof structure and interior of the building.
Regular maintenance tasks include clearing debris, checking for wear and tear, inspecting for leaks, checking for proper alignment, and addressing issues promptly.
How can I tell if my roof valley needs to be replaced?
- Water damage: If you notice water stains or water damage on the ceiling or walls near the valley, it could be a sign of a leak in the valley.
- Missing or damaged shingles: If the shingles in the valley are missing or damaged, it can leave the roof structure exposed to the elements, which can lead to leaks and other damage.
- Cracks or corrosion in metal valleys: If you have a metal valley, check for cracks, corrosion, or other signs of wear and tear. These can weaken the valley and make it more vulnerable to leaks and damage.
- Wear and tear: Over time, the valley can become worn and damaged due to exposure to the elements. Check the valley for signs of wear and tear, such as rust or cracks.
- Improper installation: If the valley was not installed properly, it can lead to leaks, premature wear and tear on the roof structure, and other issues. If you suspect that the valley was not installed properly, it may need to be replaced.
How can I prevent leaks in my roof valley?
- Regularly inspect and maintain the valley: Regular inspection and maintenance can help you identify any issues before they turn into leaks. Keep the valley clear of debris, check for signs of wear and tear, and address any issues promptly.
- Install flashing properly: Proper installation of flashing is critical to prevent leaks in the valley. Work with a professional roofing contractor who has experience with valley installation to ensure that the flashing is installed correctly.
- Use high-quality materials: Using high-quality materials, such as durable flashing and shingles, can help prevent leaks in the valley. Invest in high-quality materials that are designed to withstand the elements.
- Address ice dams promptly: In colder climates, ice dams can form in the valley and cause leaks. Promptly address any ice dams to prevent damage to the valley and roof structure.
- Consider a different type of valley: If your current valley is prone to leaks, consider a different type of valley, such as a closed valley or a woven valley. Work with a professional roofing contractor to determine the best type of valley for your specific roof.
What is the difference between a valley shingle and a regular shingle?
A valley shingle is a specially designed shingle that is used specifically for the valleys of a roof. Valley shingles are typically cut at an angle to fit into the valley and create a seamless transition between the two sides of the roof.
They are also thicker and more durable than regular shingles, as the valley is a high-stress area of the roof and is more prone to damage from water and debris.
Valley shingles also have a slightly different design, with a different pattern of tabs and cutouts, to help them fit into the valley and provide proper coverage and protection.
Regular shingles, on the other hand, are designed to be used on the rest of the roof, outside of the valley.
They are typically thinner and less durable than valley shingles, as they do not need to withstand the same level of stress and are not as prone to damage from water and debris.
What determines the type of valleys your roof has?
The type of roof valley that your roof has is determined by a number of factors, including the design and architecture of the building, the type of roof covering, and the local climate.
Some common types of roof valleys include open valleys, closed valleys, and woven valleys, each of which has its own pros and cons.
The choice of valley type also depends on the preference of the homeowner or the roofing contractor.
The slope of the roof, the location of the valley, and the overall design of the roof structure can also influence the type of valley that is chosen.
In general, it’s important to choose a valley that is appropriate for the specific roof design and that provides proper protection against water and debris to prevent leaks and damage to the roof structure and interior.
Other interesting articles: